


 2025-10-18
 BEST
BEST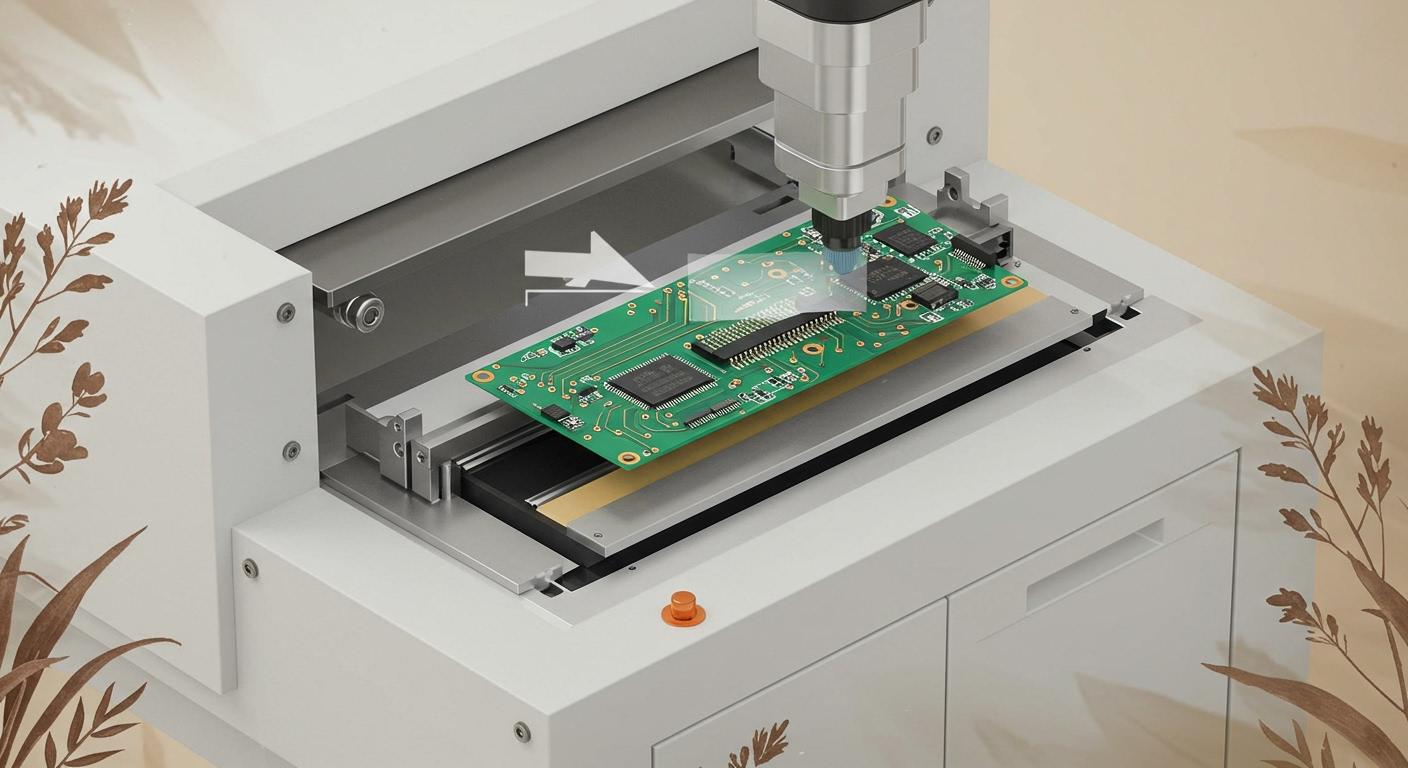
Fpcb overmolding protects flexible printed circuit boards from harsh environments and mechanical stress. You need a step-by-step guide to help you achieve reliable results during this process. When you use overmolding, you increase the durability and lifespan of your electronics. You also shield sensitive components from moisture, dust, and vibration. This protection improves the performance and reliability of your devices.
Key Takeaways
- FPCB overmolding enhances durability and protects sensitive components from moisture, dust, and mechanical stress.
- Follow a step-by-step process, including mold design, PCB preparation, and material injection, to achieve reliable results.
- Select the right materials and maintain mold precision to ensure optimal performance and flexibility in your overmolded PCBs.
- Implement strong quality control measures, such as automated inspections, to catch defects early and ensure high standards.
- Regular maintenance of equipment and molds is essential for smooth operations and improved reliability in the overmolding process.
FPCB Overmolding Basics
What Is FPCB Overmolding
You use fpcb overmolding to protect flexible printed circuit boards by covering them with a layer of molded material. This process creates a strong barrier around the circuit, shielding it from physical and environmental hazards. In pcb overmolding, you place the flexible board into a mold and inject a protective compound, such as thermoplastic or silicone, around it. The result is a sealed unit that can withstand bending, vibration, and exposure to harsh conditions. You often see pcb overmolding in industries where reliability and durability matter, such as automotive, medical devices, and consumer electronics.
Tip: Careful material selection ensures the overmolded board remains flexible and maintains its electrical performance.
Benefits
When you choose pcb overmolding, you gain several important advantages. The benefits of pcb overmolding go beyond simple protection. You improve the overall performance and lifespan of your devices. Here are some key benefits of pcb overmolding:
- You increase the durability of your circuit board. Overmolding strengthens the structure, making it shock-resistant and able to absorb impacts.
- You achieve higher environmental resistance. Overmolded boards can reach IP67 or IP68 ratings, which means they resist water, dust, oil, UV rays, and chemical corrosion.
- You simplify assembly. Overmolding reduces the number of separate parts you need, making the manufacturing process more efficient.
The benefits of pcb overmolding also include better reliability for sensitive electronics. You protect delicate components from moisture and contaminants. With the right material selection, you ensure the overmolded board meets your application’s needs and remains flexible where required.
Note: Always review your material selection and design to maximize the benefits of pcb overmolding and avoid issues during production.
Step-by-Step Guide For Flex PCB Overmolding
The pcb overmolding process involves several critical steps. Each stage plays a key role in ensuring the protection, durability, and improved functionality of your flexible printed circuit boards. By following this guide, you can achieve reliable results and avoid common pitfalls during prototyping and production.
Mold Design
You start with mold design. This step determines the shape, size, and features of the final overmolded pcbs. You must consider the layout of the pcb, the location of sensitive components, and the required thickness of the overmolded layer. High-precision fixtures and positioning tools help you achieve uniform overmolding. Proper mold ventilation and flow channel design allow air to escape during injection, preventing defects. During prototyping, you can test different mold configurations to optimize the process before full-scale production.
Tip: Always balance thermal stress and control component height in your mold design. This reduces the risk of damage during demolding.
PCB Preparation
You prepare the pcb before overmolding to ensure optimal adhesion and protection. Clean the pcb assembly thoroughly to remove dust, oils, and other contaminants. Pre-dry the pcb to eliminate moisture, which can cause bubbles or delamination during the overmolding process. Adjust temperature and pressure settings based on the pcb’s heat resistance. This prevents damage to fragile components. During prototyping, you can refine these parameters to match your specific board design.
Pre-Encapsulation
You pre-encapsulate sensitive components to shield them from mechanical stress and temperature changes during the overmolding process. This step is especially important for delicate chips, connectors, or sensors. Use compatible encapsulation materials that provide the necessary mechanical and thermal properties. Pre-encapsulation enhances the protection of your pcb and ensures reliable performance in the final product.
Substrate Molding
You create the substrate mold to support the pcb during overmolding. The substrate provides a stable base and helps maintain the correct alignment of the board. Use high-precision fixtures to hold the pcb in place. This step is crucial for achieving uniform coverage and preventing functional failures. During prototyping, you can adjust the substrate design to improve the fit and support for your specific pcb layout.
Loading PCB
You load the prepared pcb into the mold. Align the board precisely to ensure the overmolded material covers all required areas without shifting. Use positioning tools and fixtures to secure the pcb. Proper alignment prevents defects and ensures the functionality of the finished product. This step also helps you avoid issues during demolding.
Material Injection
You inject the overmolding material, such as thermoplastic or silicone, into the mold. Control the injection speed, temperature, and pressure to match the pcb’s specifications. Proper process control prevents damage to sensitive components and ensures complete coverage. During prototyping, you can experiment with different materials and settings to achieve the best results for your application.
Cooling
You allow the overmolded pcb to cool and solidify inside the mold. Cooling time depends on the material and the thickness of the overmolded layer. Uniform cooling prevents warping and ensures a strong bond between the pcb and the overmolding material. Monitor the cooling process closely to maintain quality and consistency.
Demolding
You remove the overmolded pcb from the mold with care. Use gradual pressure and high-precision fixtures to minimize the risk of damage. Design optimization, such as balancing thermal stress and adding mechanical support, helps protect the board during this step. For delicate components, consider low-pressure molding techniques. Special protection measures, like pre-encapsulation, further reduce the risk of damage during demolding.
Post-Processing
You inspect the overmolded pcb for defects, such as incomplete coverage, bubbles, or misalignment. Trim excess material and perform any necessary finishing steps. Quality control at this stage ensures the overmolded pcbs meet your performance and reliability standards. During prototyping, you can use this feedback to refine earlier steps in the process.
Note: Cleanliness and protection are essential throughout the pcb overmolding process. Always handle sensitive components with care and maintain a clean working environment to achieve the best results.
By following these steps, you can master the pcb overmolding process and produce reliable, high-performance flexible circuit boards for a wide range of applications.
Considerations About Bendable Board Overmolding
Material Selection
You need to select materials that match the demands of your application. The right choice ensures your pcb overmolding process delivers both protection and flexibility. Consider the following criteria when choosing materials for bendable board overmolding:
| Criteria | Description |
|---|---|
| Functionality | Understand the core function of the part to ensure the design is tailored to its purpose. |
| Consistent wall thickness | Ensure steady thickness for optimal material performance. |
| Material Compatibility | Check chemical and physical compatibility for a solid and durable bond. |
| Mechanical properties | Consider flexibility, tensile strength, impact resistance, and environmental factors. |
| Aesthetics | Choose materials with appealing texture, color, and finish. |
| Regulatory requirements | Ensure compliance with safety standards relevant to the application, such as food safety and insulation. |
You improve the reliability of your pcb by focusing on compatibility and mechanical properties. Always check if the overmolding material bonds well with the pcb and meets regulatory requirements.
Design Tips
You can enhance the flexibility and durability of overmolded pcbs by following proven design practices. Start by understanding the mechanical and electrical principles behind your application. Adapt your design to meet specific needs. Use these tips to optimize your pcb overmolding process:
- Optimize copper thickness to balance flexibility, conductivity, and durability.
- Place copper layers near the neutral axis to reduce strain and prevent cracking.
- Design the stackup with proper layer spacing for flexibility and reduced stress.
- Select copper thickness based on whether you need more flexibility or lower resistance.
- Consider the type of application—dynamic or static—when setting design priorities.
- Place conductors strategically to boost performance.
- Manage bend areas to withstand repeated flexing.
- Avoid risky configurations that could cause mechanical failure.
- Adjust the bend radius to fit your application.
Tip: Tailor your design to the specific requirements of your pcb to maximize the benefits of fpcb overmolding.
Protection
You protect your pcb from moisture, dust, and mechanical stress through effective overmolding. The process creates a tough cover that blocks water, chemicals, and debris. Overmolding absorbs shocks and vibrations, which helps prevent solder joints and connections from breaking. You also gain strain relief for wires and connectors, reducing the risk of snapping during use. The soft layer of overmolding prevents scratches and surface damage.
- Overmolding forms tight seals and gaskets to prevent leaks.
- It provides insulation, reducing the risk of electrical shorts.
- Devices with pcb overmolding can operate in harsh environments without failure.
By following these considerations, you ensure your pcb overmolding process delivers reliable, long-lasting results for bendable electronics.
Challenges For FPCB Fabrication
Avoiding Damage
You face several types of damage during pcb overmolding. Short circuits often occur from welding bridges or environmental factors. You can prevent these by checking for short circuits on the pcb surface and ensuring proper alignment during assembly. Electrical testing for inner layers helps you catch hidden issues. You also need to watch for lifted pads, component shifting, ESD damage, and flux residue. The table below shows common types of damage and how you can prevent them:
| Type of Damage | Prevention Methods |
|---|---|
| Lifted Pads | Use proper pcb design, control component placement, keep the environment clean, and use robust reflow oven profiling. |
| Component Shifting | Optimize solder paste stencil design, use accurate placement systems, and maintain a stable reflow oven. |
| ESD Damage | Implement ESD protection, train staff, and use ESD-safe materials. |
| Flux Residue | Select the right flux, clean thoroughly, and monitor cleaning effectiveness. |
You should also address cold joints, solder bridges, and insufficient solder. Use the right soldering temperature and technique, apply enough solder, and inspect connections visually. These steps help you maintain the functionality and reliability of your overmolded pcbs.
Mold Precision
You need high mold precision for successful pcb overmolding. Accurate molds ensure the overmolding material covers all areas without damaging the pcb. During prototyping, you can test different mold designs to find the best fit. Use high-precision fixtures and alignment tools to keep the pcb in place. This reduces the risk of shifting or warping during the process. Mold precision also helps you achieve consistent results in mass production, which is critical for quality control.
Tip: Always verify mold alignment before each production run to avoid costly errors.
Process Control
You must control every step of the overmolding process to achieve reliable results. Monitor temperature, pressure, and injection speed closely. Adjust these parameters based on the pcb’s heat resistance and the chosen overmolding material. During prototyping, you can refine your process settings to match your specific application. Consistent process control prevents defects and ensures the durability of your pcb. You also improve the overall efficiency of your manufacturing line.
By focusing on damage prevention, mold precision, and process control, you can overcome the main challenges in fpcb overmolding. These steps help you deliver high-quality, reliable products that meet your customers’ needs.
Best Practices for Overmolded PCBs
Quality Control
You need strong quality control to ensure your overmolded pcbs meet industry standards. Start by inspecting each pcb before and after overmolding. Use advanced inspection methods to catch defects early. Automated Optical Inspection (AOI) uses imaging tools to spot surface and beneath-the-surface issues. X-ray inspection helps you find hidden problems in multilayer designs, which is important for high-tech electronics. In-circuit testing (ICT) checks for component defects and circuit continuity, making sure your pcb works before final testing.
| Inspection Method | Description |
|---|---|
| Automated Optical Inspection (AOI) | Uses imaging tools to check for defects, providing a non-contact analysis of beneath-the-surface issues. |
| X-Ray Inspection | Detects hidden defects in multilayer designs, crucial for high-tech electronics. |
| In-Circuit Testing (ICT) | Fast checks for component defects and circuit continuity, ensuring functionality before final testing. |
Tip: Combine these inspection methods for the best results in detecting defects during fpcb overmolding.
Optimization
You can improve your pcb overmolding process by focusing on optimization. Start with prototyping to test different materials and mold designs. Adjust process parameters like temperature, pressure, and injection speed to match your pcb’s needs. Use feedback from each prototyping round to refine your approach. Track key metrics such as yield rate and defect rate to measure progress. Apply best practices for pcb overmolding design, including careful placement of sensitive components and consistent wall thickness. These steps help you achieve reliable, high-quality results.
- Test multiple materials during prototyping.
- Adjust process settings based on feedback.
- Monitor yield and defect rates for continuous improvement.
Maintenance
You must maintain your equipment and molds to keep your overmolding process running smoothly. Clean molds and fixtures after each production run to prevent contamination. Inspect molds for wear or damage that could affect the fit or finish of your overmolded pcbs. Schedule regular calibration for your machines to ensure accurate temperature and pressure control. Keep detailed records of maintenance activities. This helps you spot trends and address issues before they cause defects in your pcb.
Regular maintenance extends the life of your equipment and improves the reliability of your pcb overmolding process.
By following these best practices, you can produce durable, high-performance overmolded pcbs. You will also reduce waste and improve efficiency in your manufacturing line.
PCB Overmolding Applications
Use Cases
You see fpcb overmolding in many modern electronics. This process protects your pcb from moisture, dust, and mechanical stress. You can use overmolding to improve the durability and reliability of your devices. Many engineers choose overmolding for flexible circuits in products that need to bend or move.
Here are some common applications of pcb overmolding:
- Medical devices, such as diagnostic sensors and implantable electronics, rely on overmolded pcbs for safety and hygiene.
- Automotive electronics, including steering controls, sensors, and lighting modules, use overmolding to shield circuits from dust and debris.
- Wearable technology, like fitness trackers and smartwatches, benefits from flexible and protected pcbs.
- Industrial controls, such as control panels and IoT sensors, require overmolding to withstand harsh environments.
- Consumer electronics, including foldable phones and headphones, use overmolding for both protection and flexibility.
Overmolding helps you create products that last longer and perform better in demanding conditions.
Industry Examples
You find applications of overmolded pcbs across many industries. The table below shows where you can use this technology and what benefits it brings:
| Industry | Application Areas |
|---|---|
| Home Appliances | Protection from moisture and heat in consumer goods |
| Medical Field | Safeguarding delicate components in medical devices |
| Industrial Equipment | Enhancing durability in harsh environments |
| Automotive Industry | Shielding electronic components from dust and debris |
You can see that applications of overmolded pcbs cover a wide range of fields. Each industry values the extra protection and reliability that overmolding provides. When you design products for these markets, you improve performance and reduce the risk of failure by using overmolding.
Tip: Explore new applications of pcb overmolding as technology advances. You can find new ways to protect and enhance your electronic products.
You have learned the essential steps and design considerations for pcb overmolding. By following this guide, you can prevent pcb damage during overmolding and create a protective layer that delivers stronger environmental protection for your printed circuit board assembly. When you use these methods for embedded electronics, you achieve increased strength and wear resistance. Key takeaways include:
- Enhanced reliability by reducing failure points
- Superior durability for harsh conditions
Stay updated on new techniques to maximize the benefits of overmolding and improve your results.
.png)
.png)
.png)
.png)

.png)

